
Accipiter
Lighting & Craft Gallery
My parents opened Accipiter in 1988 as a gallery for fine American crafts and furniture. Over the years, the focus has changed and today, in addition to crafts, we sell lighting, jewelry, and fun items for the home. I literally grew up in the store, so when my parents decided to retire, my wife and I decided to take over the business.
I focus primarily on the lighting side of the business. Accipiter is one of the few lighting stores in the area that carries contemporary lighting. A deep technical understanding of lighting technology and a commitment to quality products and services has won us many long-term customers.
On this page, you'll see photos of completed lighting installations, some documentation showing how we plan lighting and ensure it's installed correctly, and photos of our in-store lighting signage and displays.
Store Signage

Our store dog, Enzo, is a big attraction, with many customers coming in just to visit him. I used an image of him on a door sign that displays our social media information.
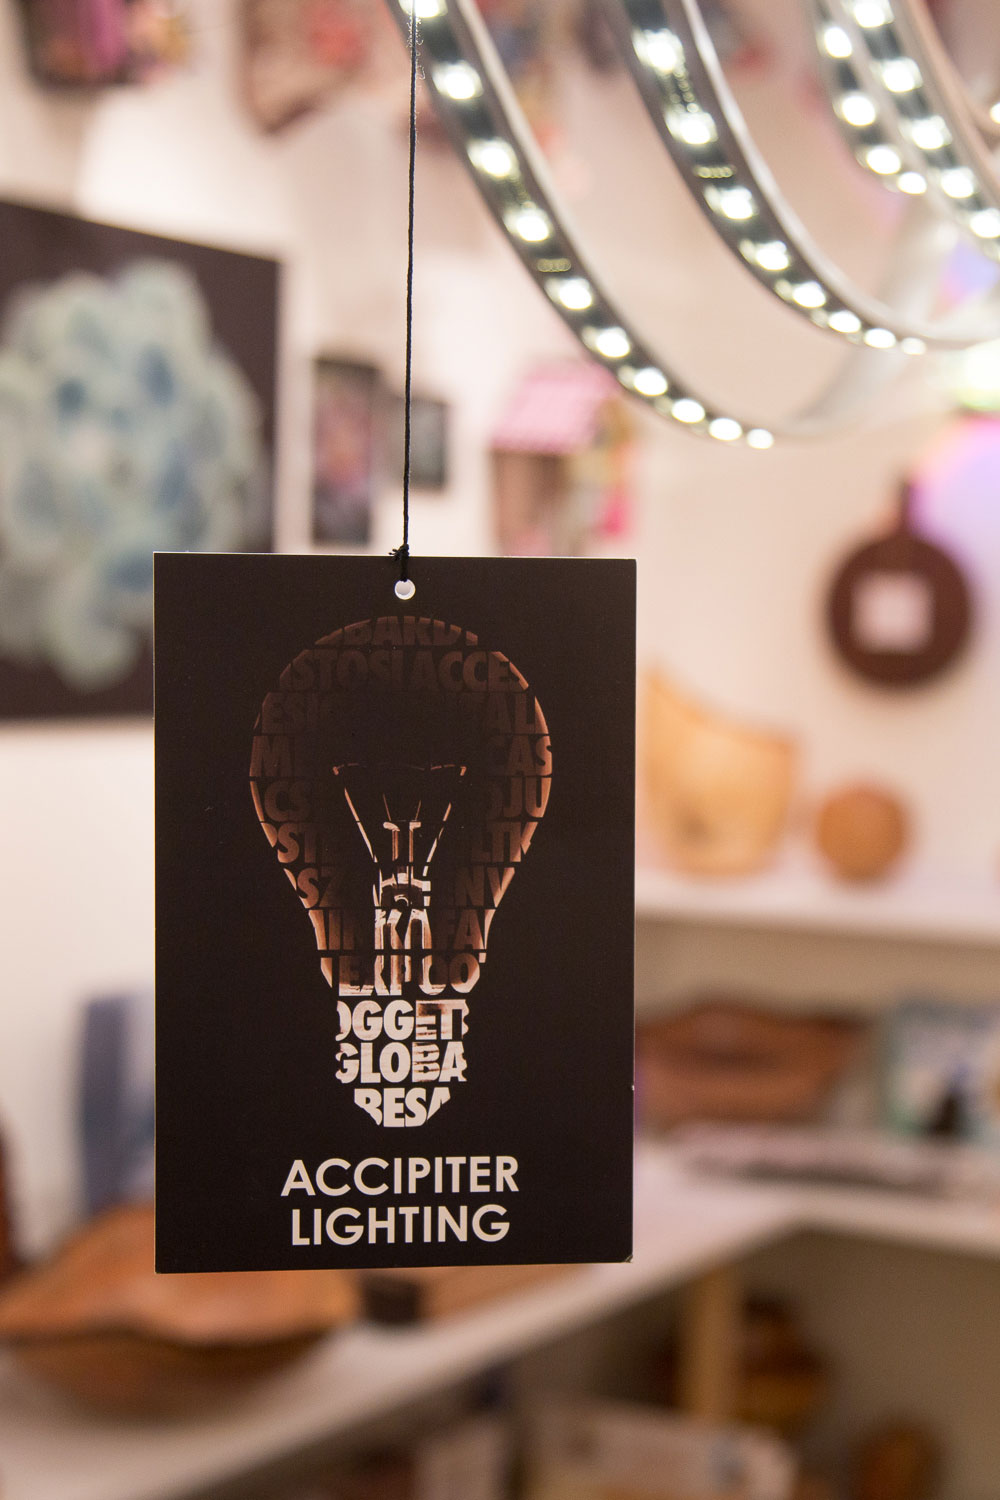
These lighting signs hang from the display fixtures in the store. This is the back side of the sign.
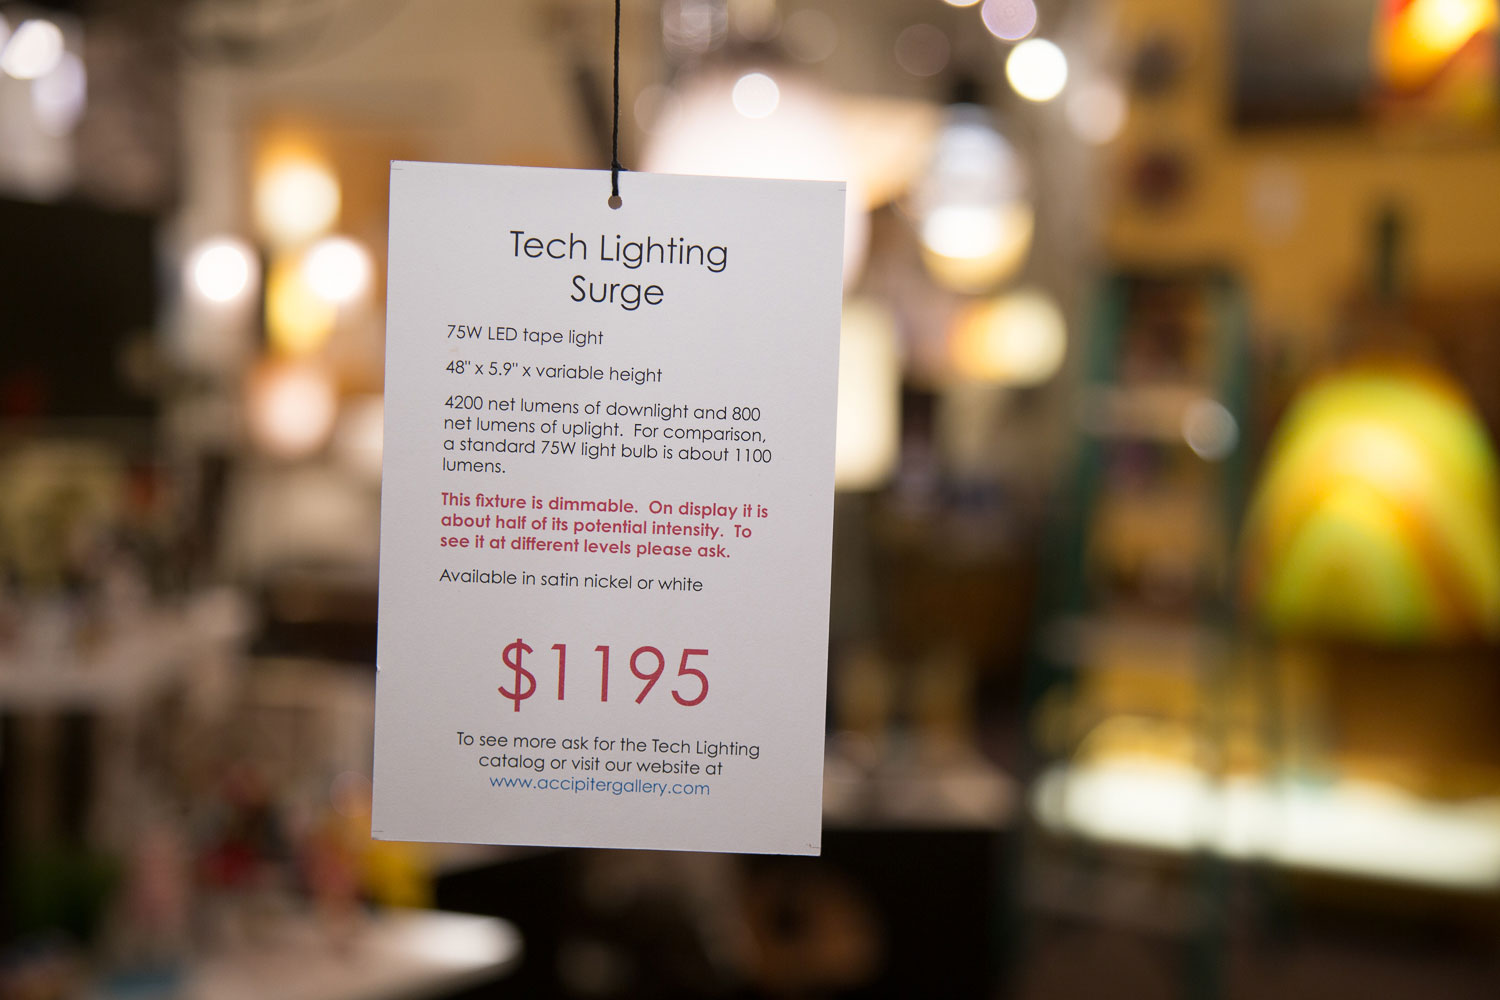
The front of the lighting sign has information about each fixture, including its manufacturer, pricing, performance, and color options. The signs are generated using an online database system that I created. The system makes it easy to quickly update the sign. The database automatically outputs a pdf of each sign ready for printing.
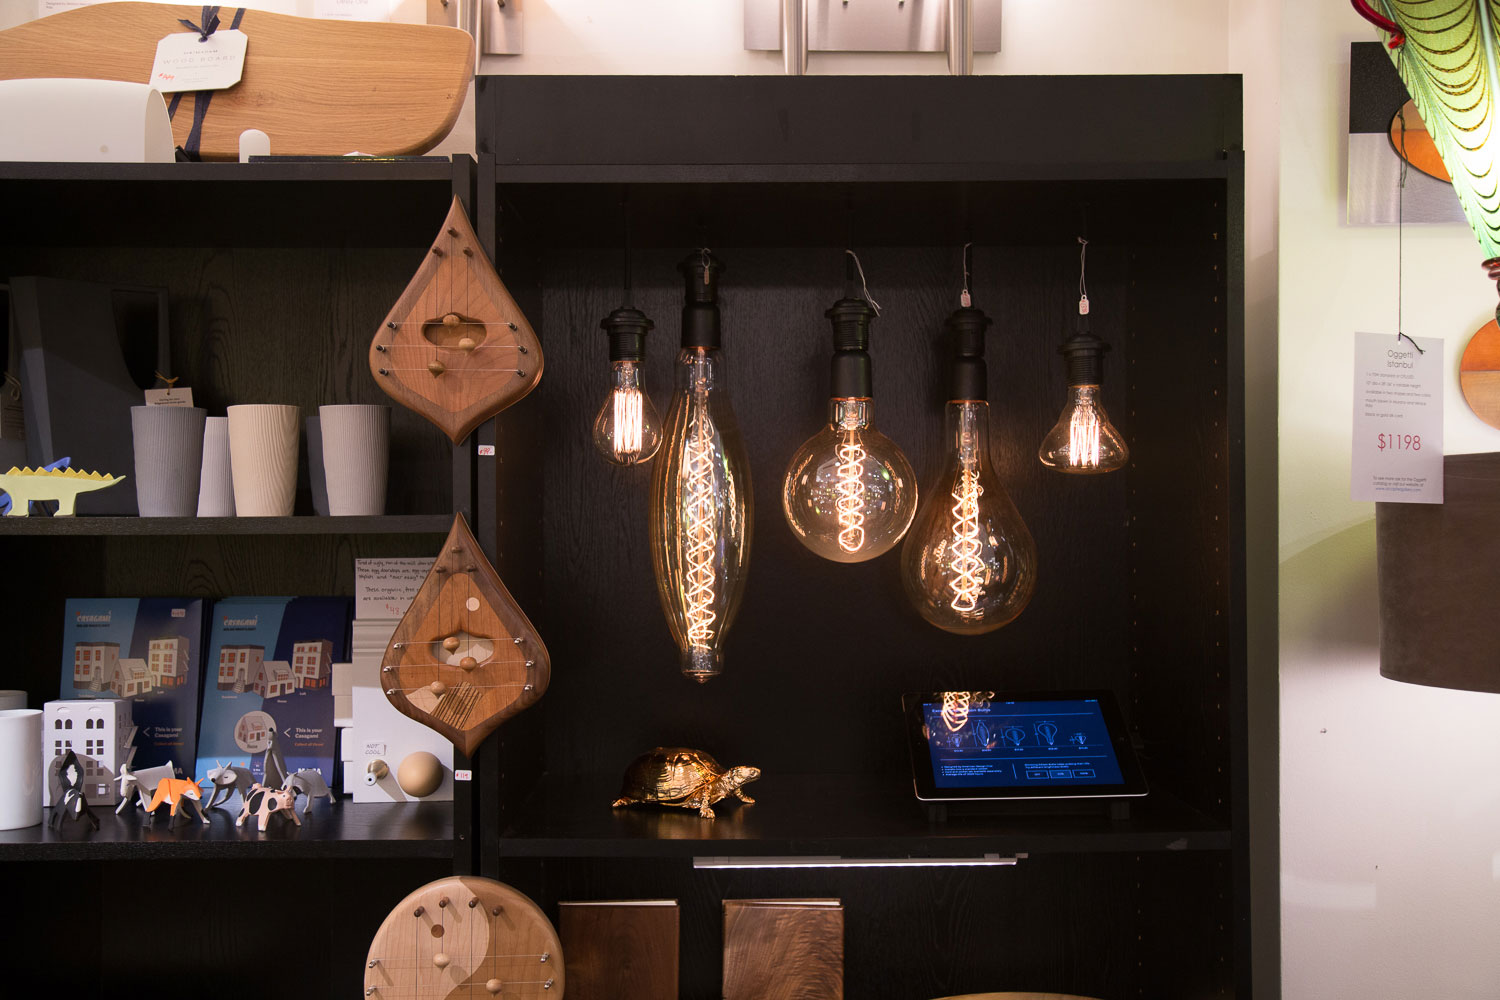
This display showcases our Edison bulbs. Information about the bulbs is displayed on an ipad sitting beneath the bulbs.
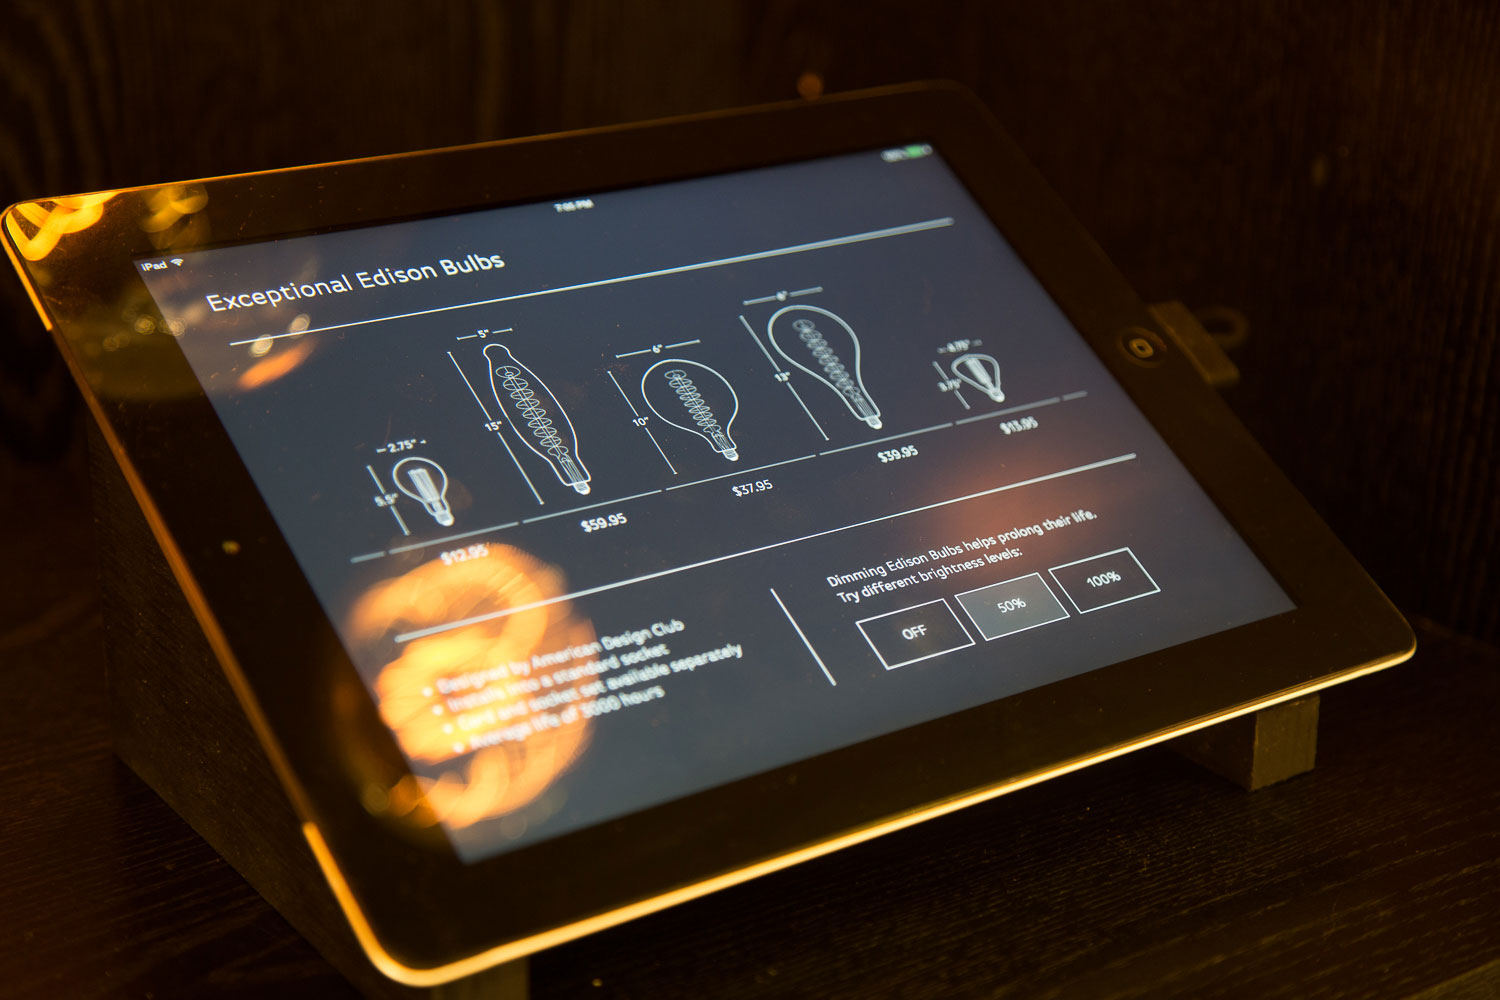
The Edison bulb ipad display has pricing and dimensions for each bulb along with some general information. On the bottom of the display, an interactive control allows customers to change the brightness level of the bulbs. We keep the bulbs dimmed to increase their life and reduce the heat they put off, but we wanted customers to be able to see what they look like when fully lit or turned off.
Completed Lighting Installations
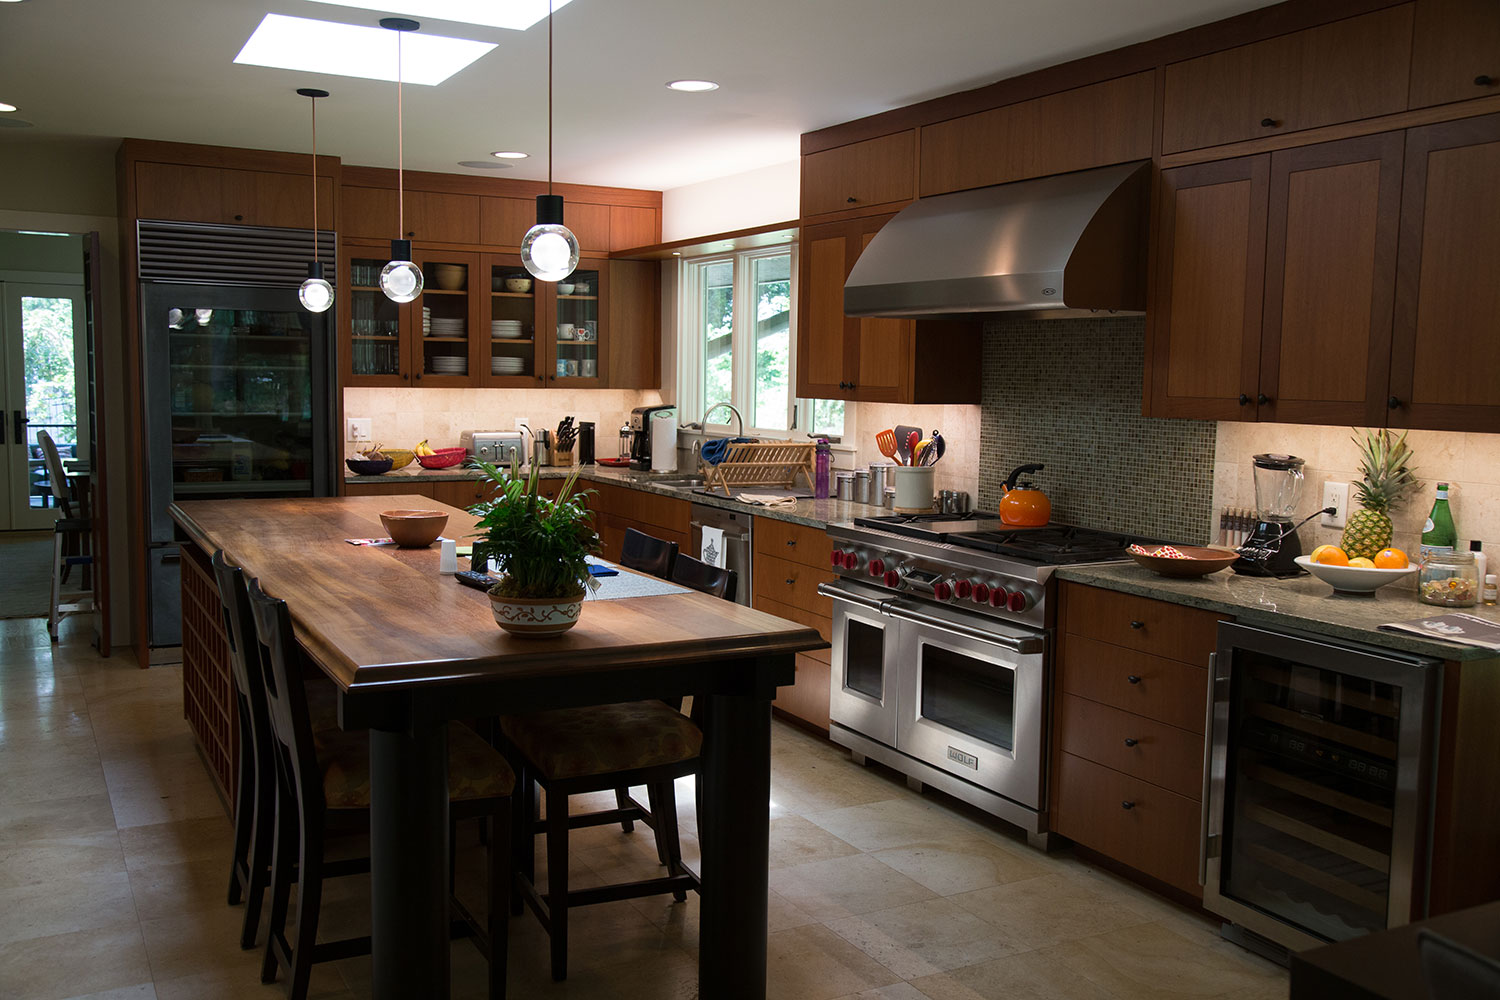
For this kitchen renovation, we helped the client and their designer select lighting that matched the contemporary design of the new cabinetry. Recessed cans and LED under-cabinet tape provided direct task lighting. The pendants and above-cabinet LED tape provided softer ambient lighting. We assisted the electrician with placement of all lights.
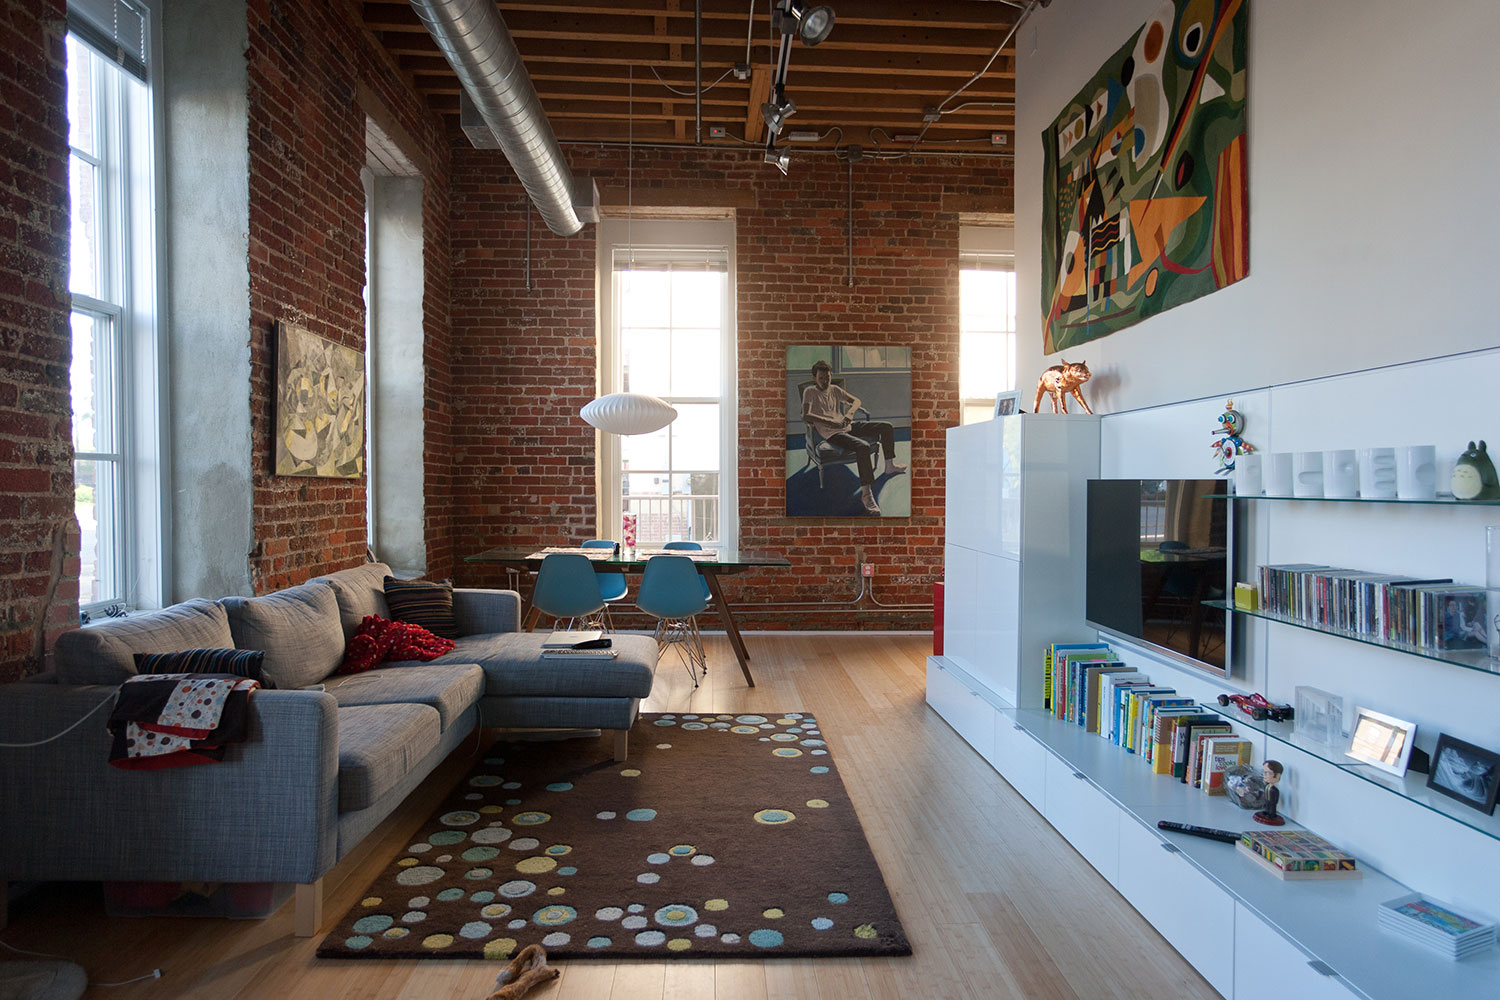
For this client, we selected a George Nelson bubble lamp for its classic design and affordable price. We installed additional track heads on the pre-existing track to better light artwork. Finally, we installed wireless dimmers so that light switches blocked by the entertainment center could still be controlled.
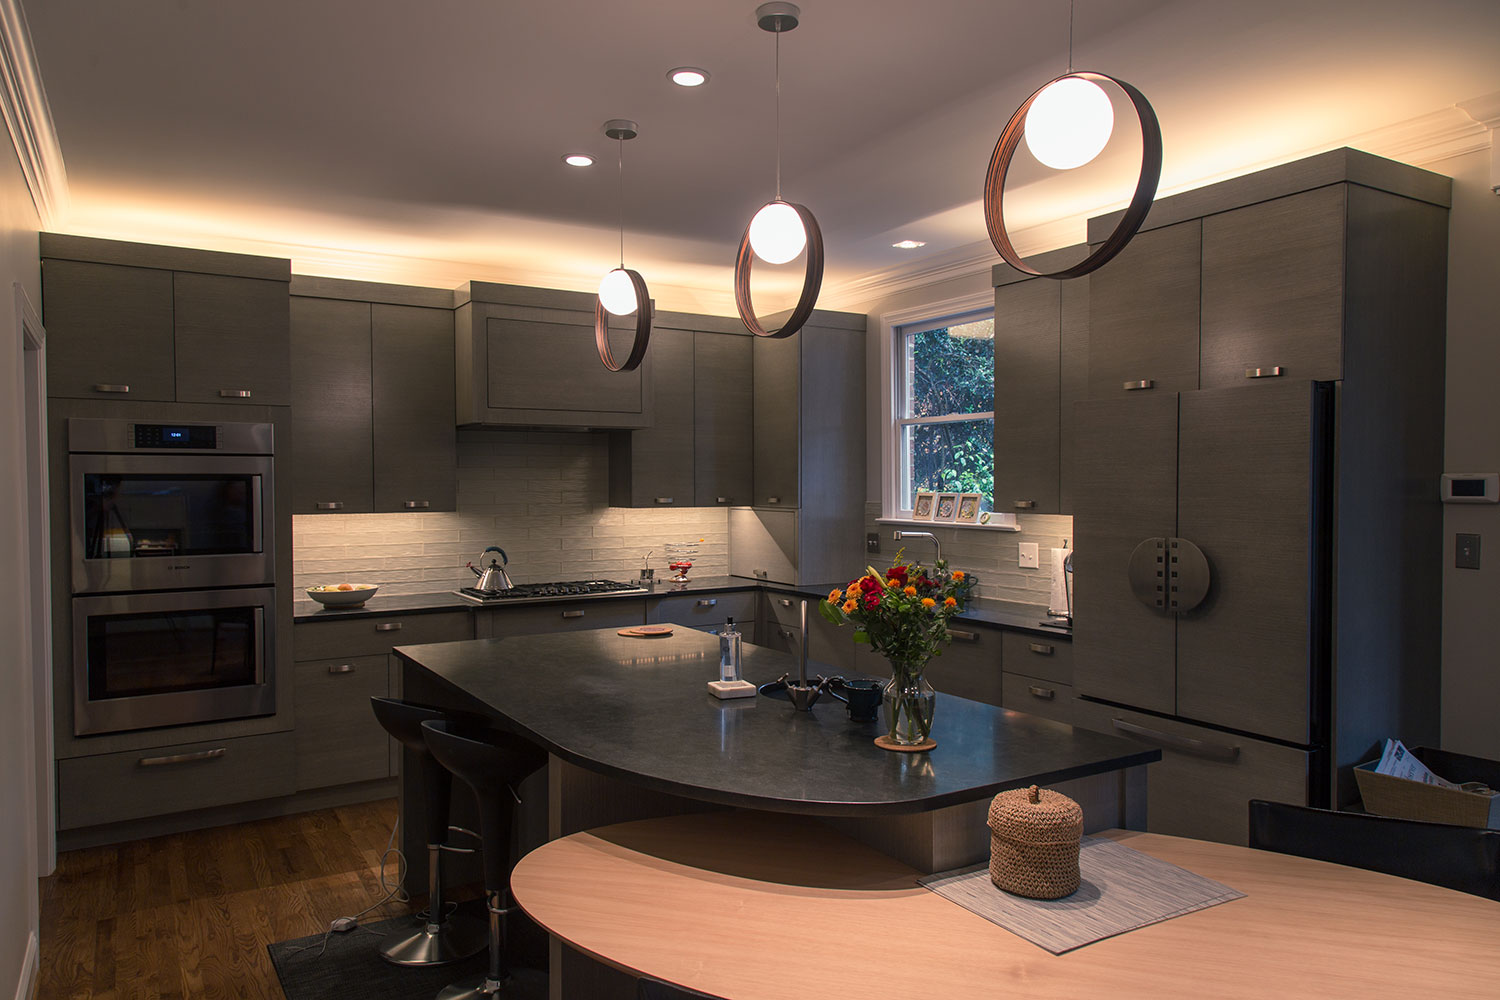
This client felt that their kitchen was too dark. We chose new pendants that provided more directional task light on the island and better matched the contemporary design of the kitchen. Much brighter under-cabinet tape light and new LED puck lights better lit the counter and the sink. The addition of above-cabinet LED tape provided ambient light and helped make an otherwise dark corner of the kitchen feel larger and more open.
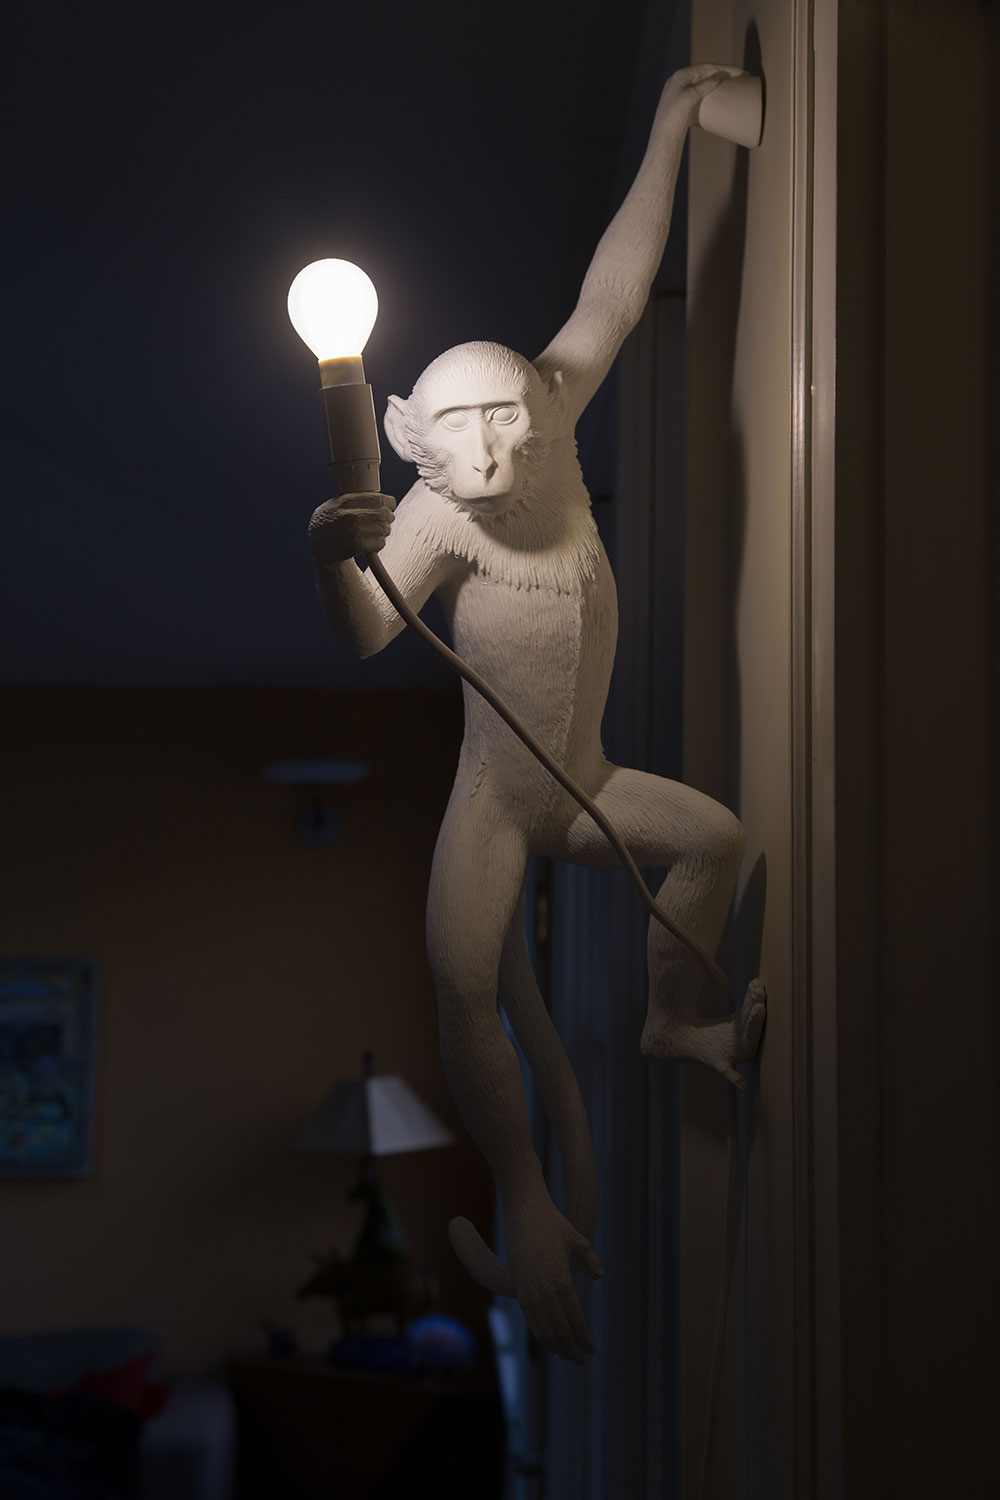
This monkey lamp is used as a night light in this client's house. The LED bulb is very energy efficient but bright enough to light the hallway at night.

This client approached us looking for a light for their child's play room. They wanted a light that would be very bright and would look good on their unique red ceilings. We selected this Italian flush mount because of its shape and very bright but indirect light.
We selected these LED vanity lights for a client's bathroom because of their unique appearance, flattering soft light, and the client's desire to not have to change light bulbs.
Lighting Planning and Installation Support
In addition to helping our clients select beautiful and functional lights, we also do site visits to help create electrical plans. Additionally, we create documents to help support electricians and ensure that the lights are installed correctly.
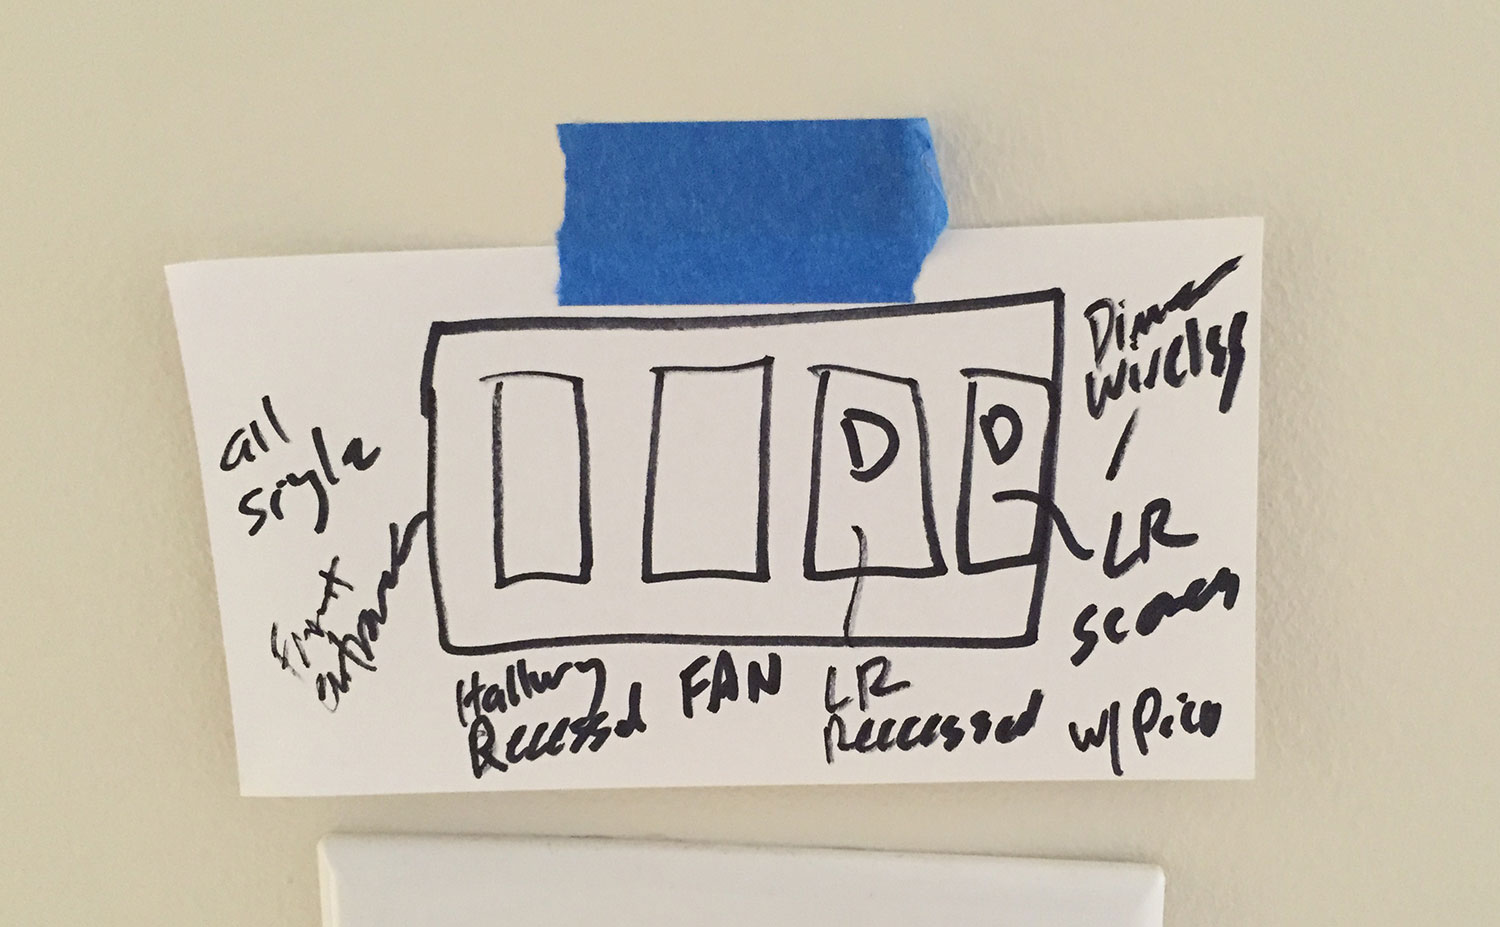
We assist clients in creating a plan for switches and receptacles. This is one area where my training as a UX designer has been quite helpful. To properly place switches, it's important to understand and anticipate how a client will use a particular space.
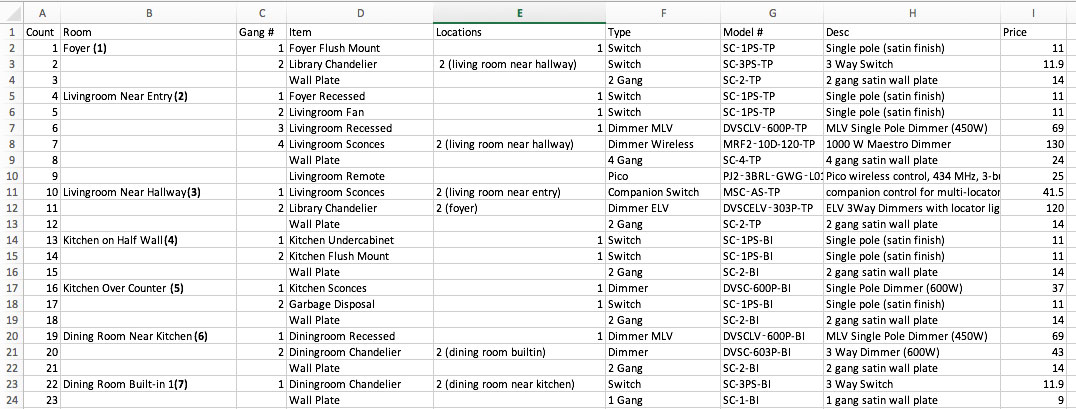
This is a screenshot of a spreadsheet that tracks a switching plan for a client. Most houses require 10 to 20 different types of dimmers, switches, and receptacles. A modified version of this spreadsheet is provided to the electrician so that they can know where to install each component.
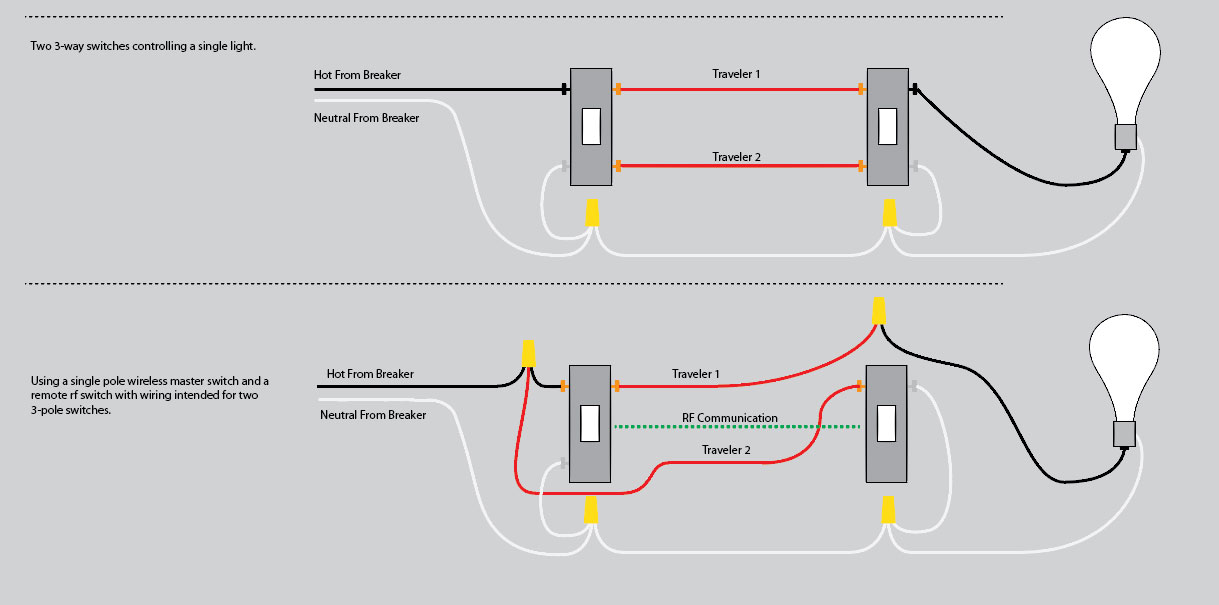
We sometimes work with electricians who aren't familiar with new types of switches and dimmers that can be controlled wirelessly and are wired differently than traditional dimmers and switches. This is a wiring diagram I created for an electrician so that they'd know how to use existing 3-way wiring to install a wireless dimmer.
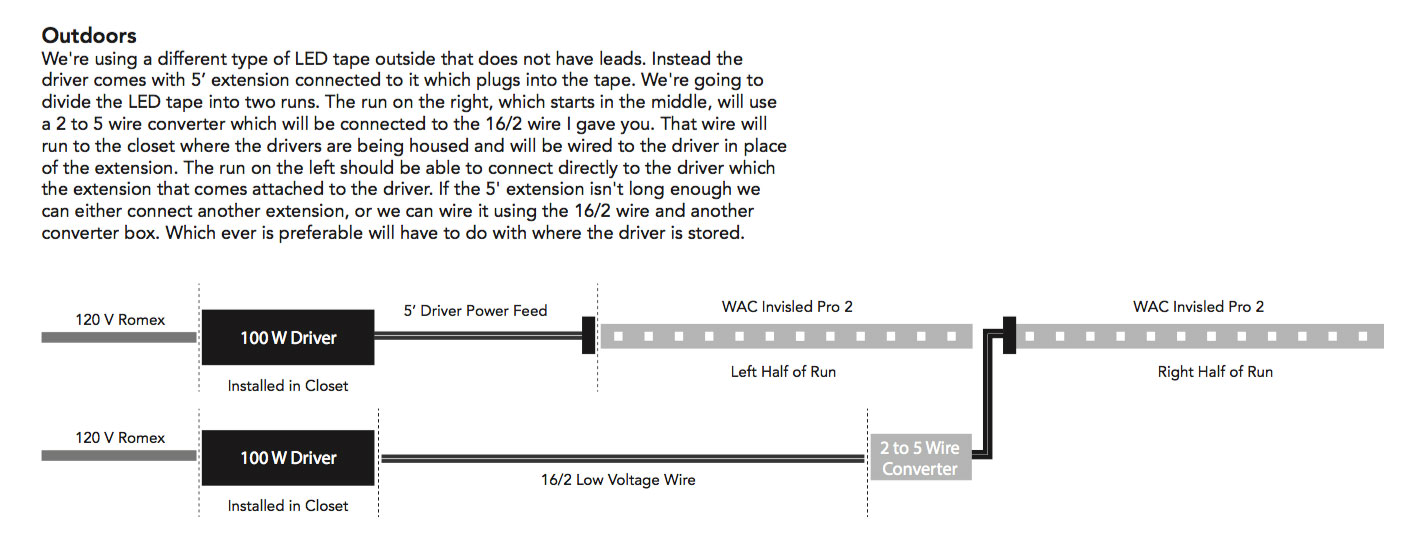
We frequently use LED tape for under-cabinet and above-cabinet lighting. When an electrician who is unfamiliar with the product is installing it, we provide wiring diagrams, like the one above, so that they know what to do.
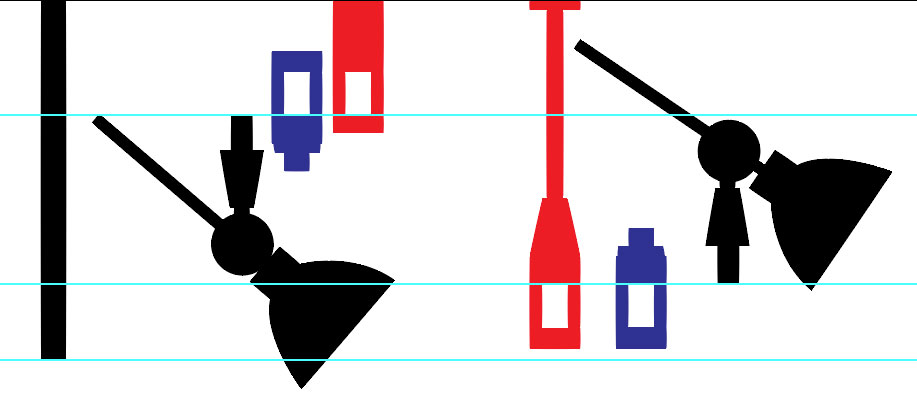
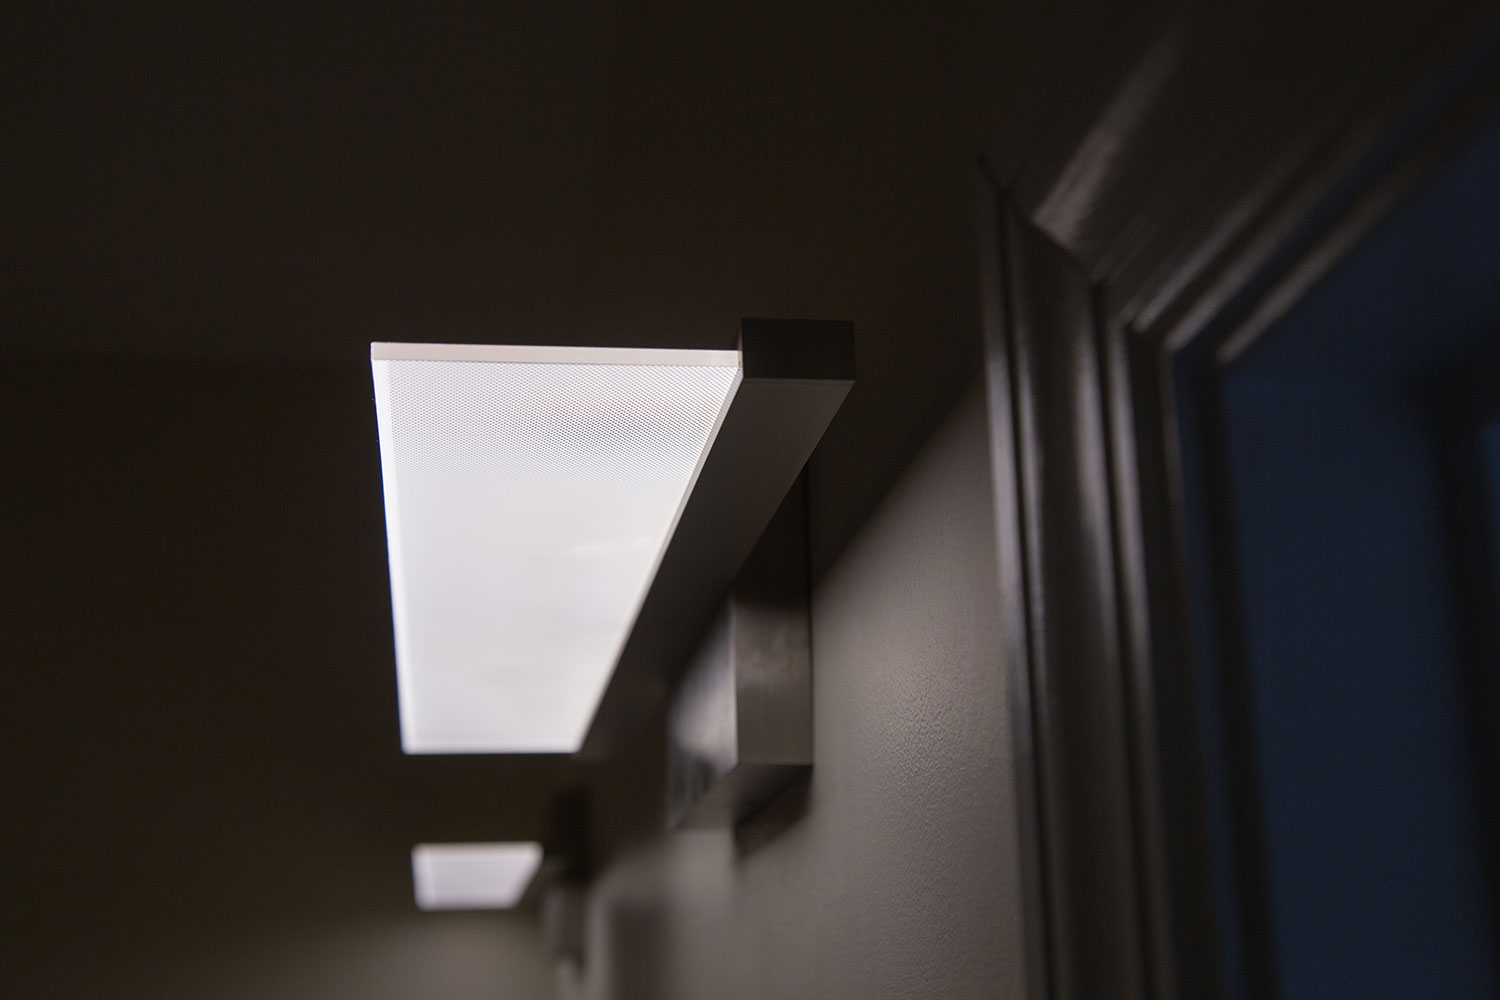
We often have to solve problems - whether it's determining how to get power to a new light, or in this case, how to light art along a hallway with very little clearance between the doors and the ceiling. To solve this problem, we modeled the heights of various heads and monorail components in illustrator to see if there would be enough clearance. We eventually found that by using the smallest head and flipping it upside-down we would have just enough clearance without sacrificing the quality of the light.
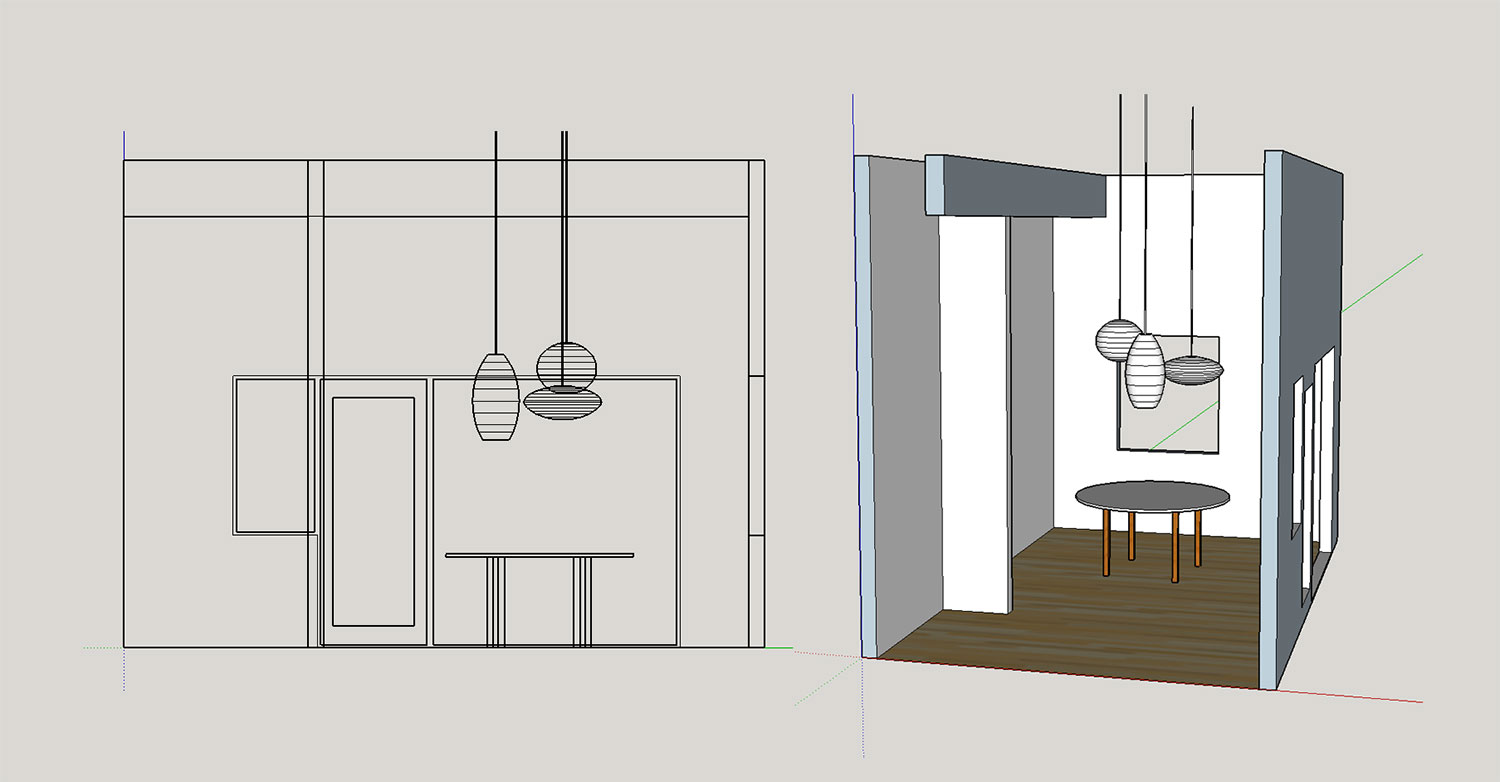
Recently we've started to use 3d modeling software to assist in selecting and placing lights. In this case, I visited the house, which was under construction, and took measurements to model the dining room. I then modeled the George Nelson bubble lamps in 3 different sizes. We then tried different combinations of size and placement until we found a layout the client liked.